WoL (Wake-on-LAN)
The following is a guide on WoL (Wake-on-LAN). It covers: what it is, how to set it up and how to troubleshoot it.
What is WoL
Wake-on-LAN (WoL) is a networking standard that allows a computer to be turned on from a low power mode, like sleep or hibernation, by a network message. WoL works by sending a 'magic packet' to a computer's network interface card (NIC) to trigger the wake-up process.
Prerequisites
For WoL to work, the target computer's motherboard and network card must support WoL, and the feature must be enabled. Additionally, the computer must be connected to a power source and the network
WoL typically requires a wired connection but if your computer doesn't have this you might still be able to wake it through a standard called Wake-on-Wireless-LAN (WoWLAN). Unfortunately, WoWLAN support isn't as widely adopted so check your computer's hardware specs to see if WoWLAN is available.
WoL, in general, can only wake computers from standby or hibernation. Some computers can be configured to allow WoL to wake them when they are shutdown but these are the exception rather than the rule.
How To Enable WoL
This covers how to enable WoL in Windows 11 but the same steps should work on Windows 10 and below.
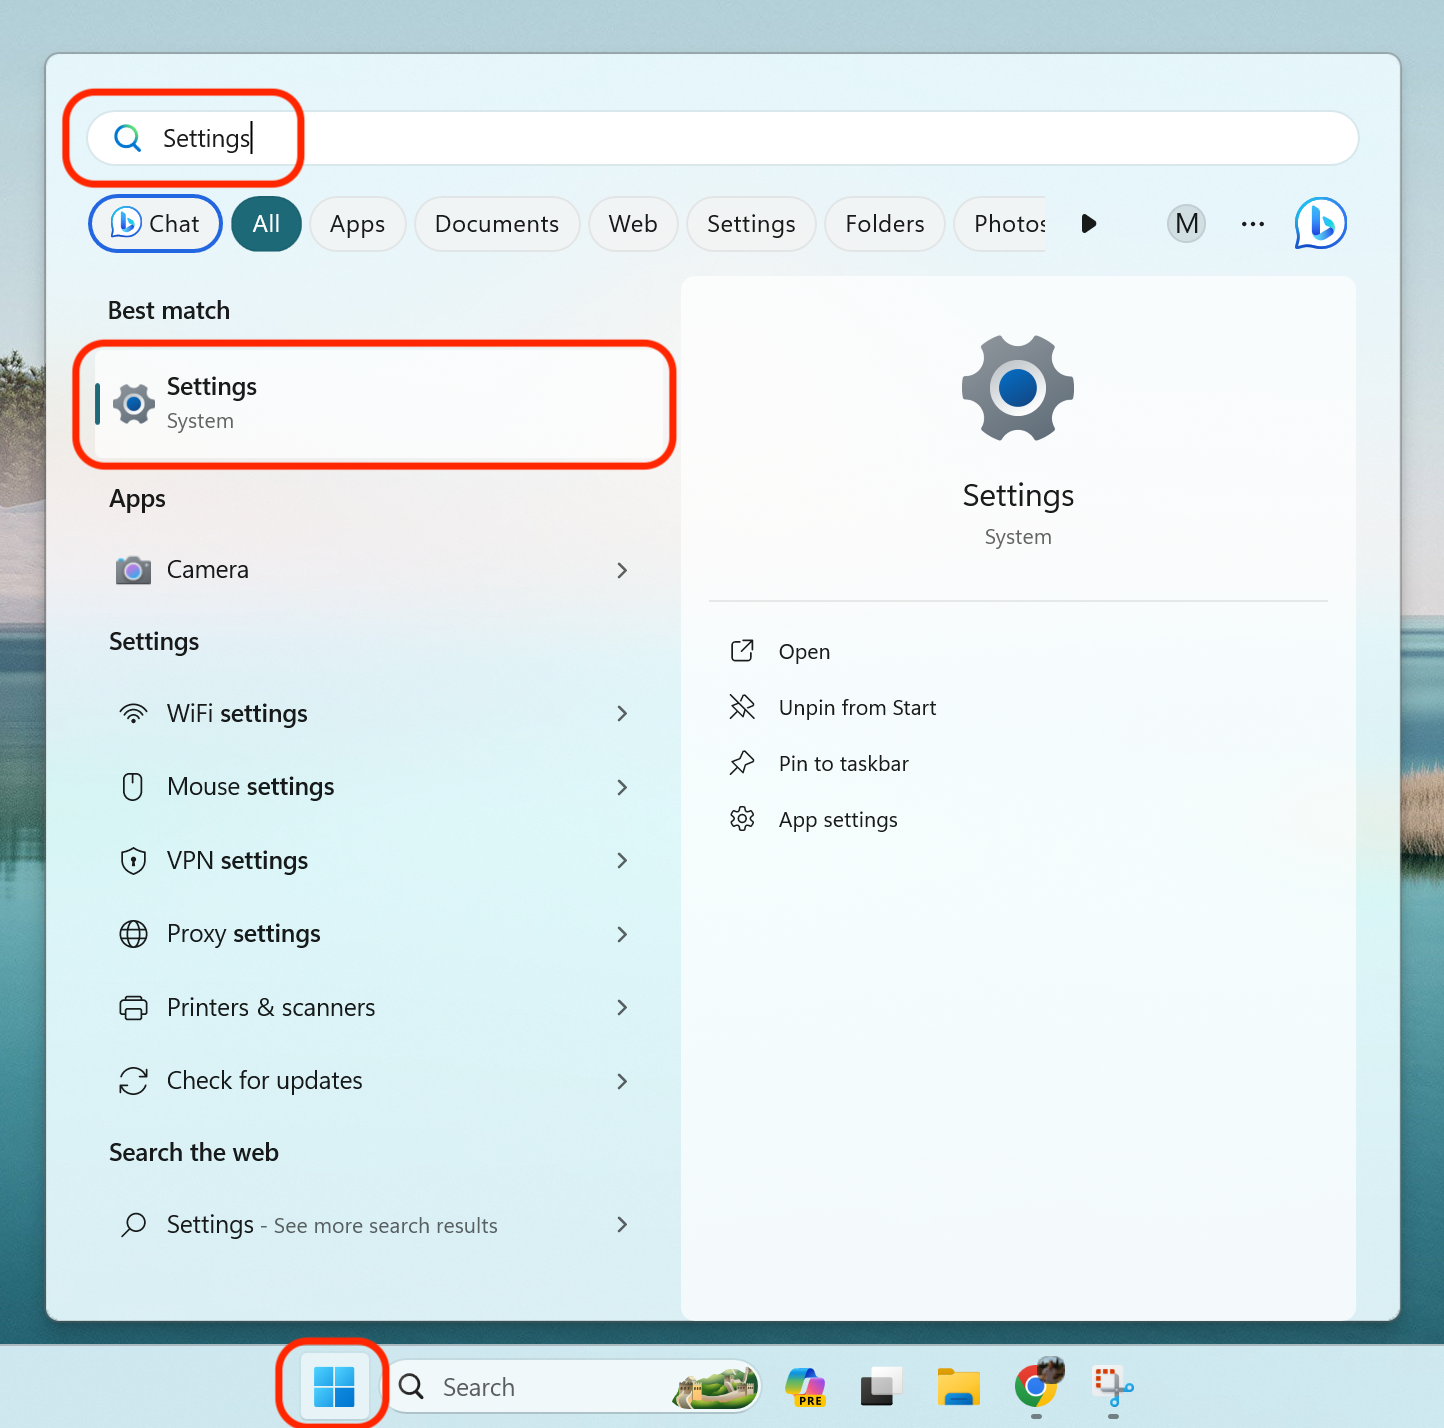
Click the Windows icon and search for "Settings". Click it to open System Settings.
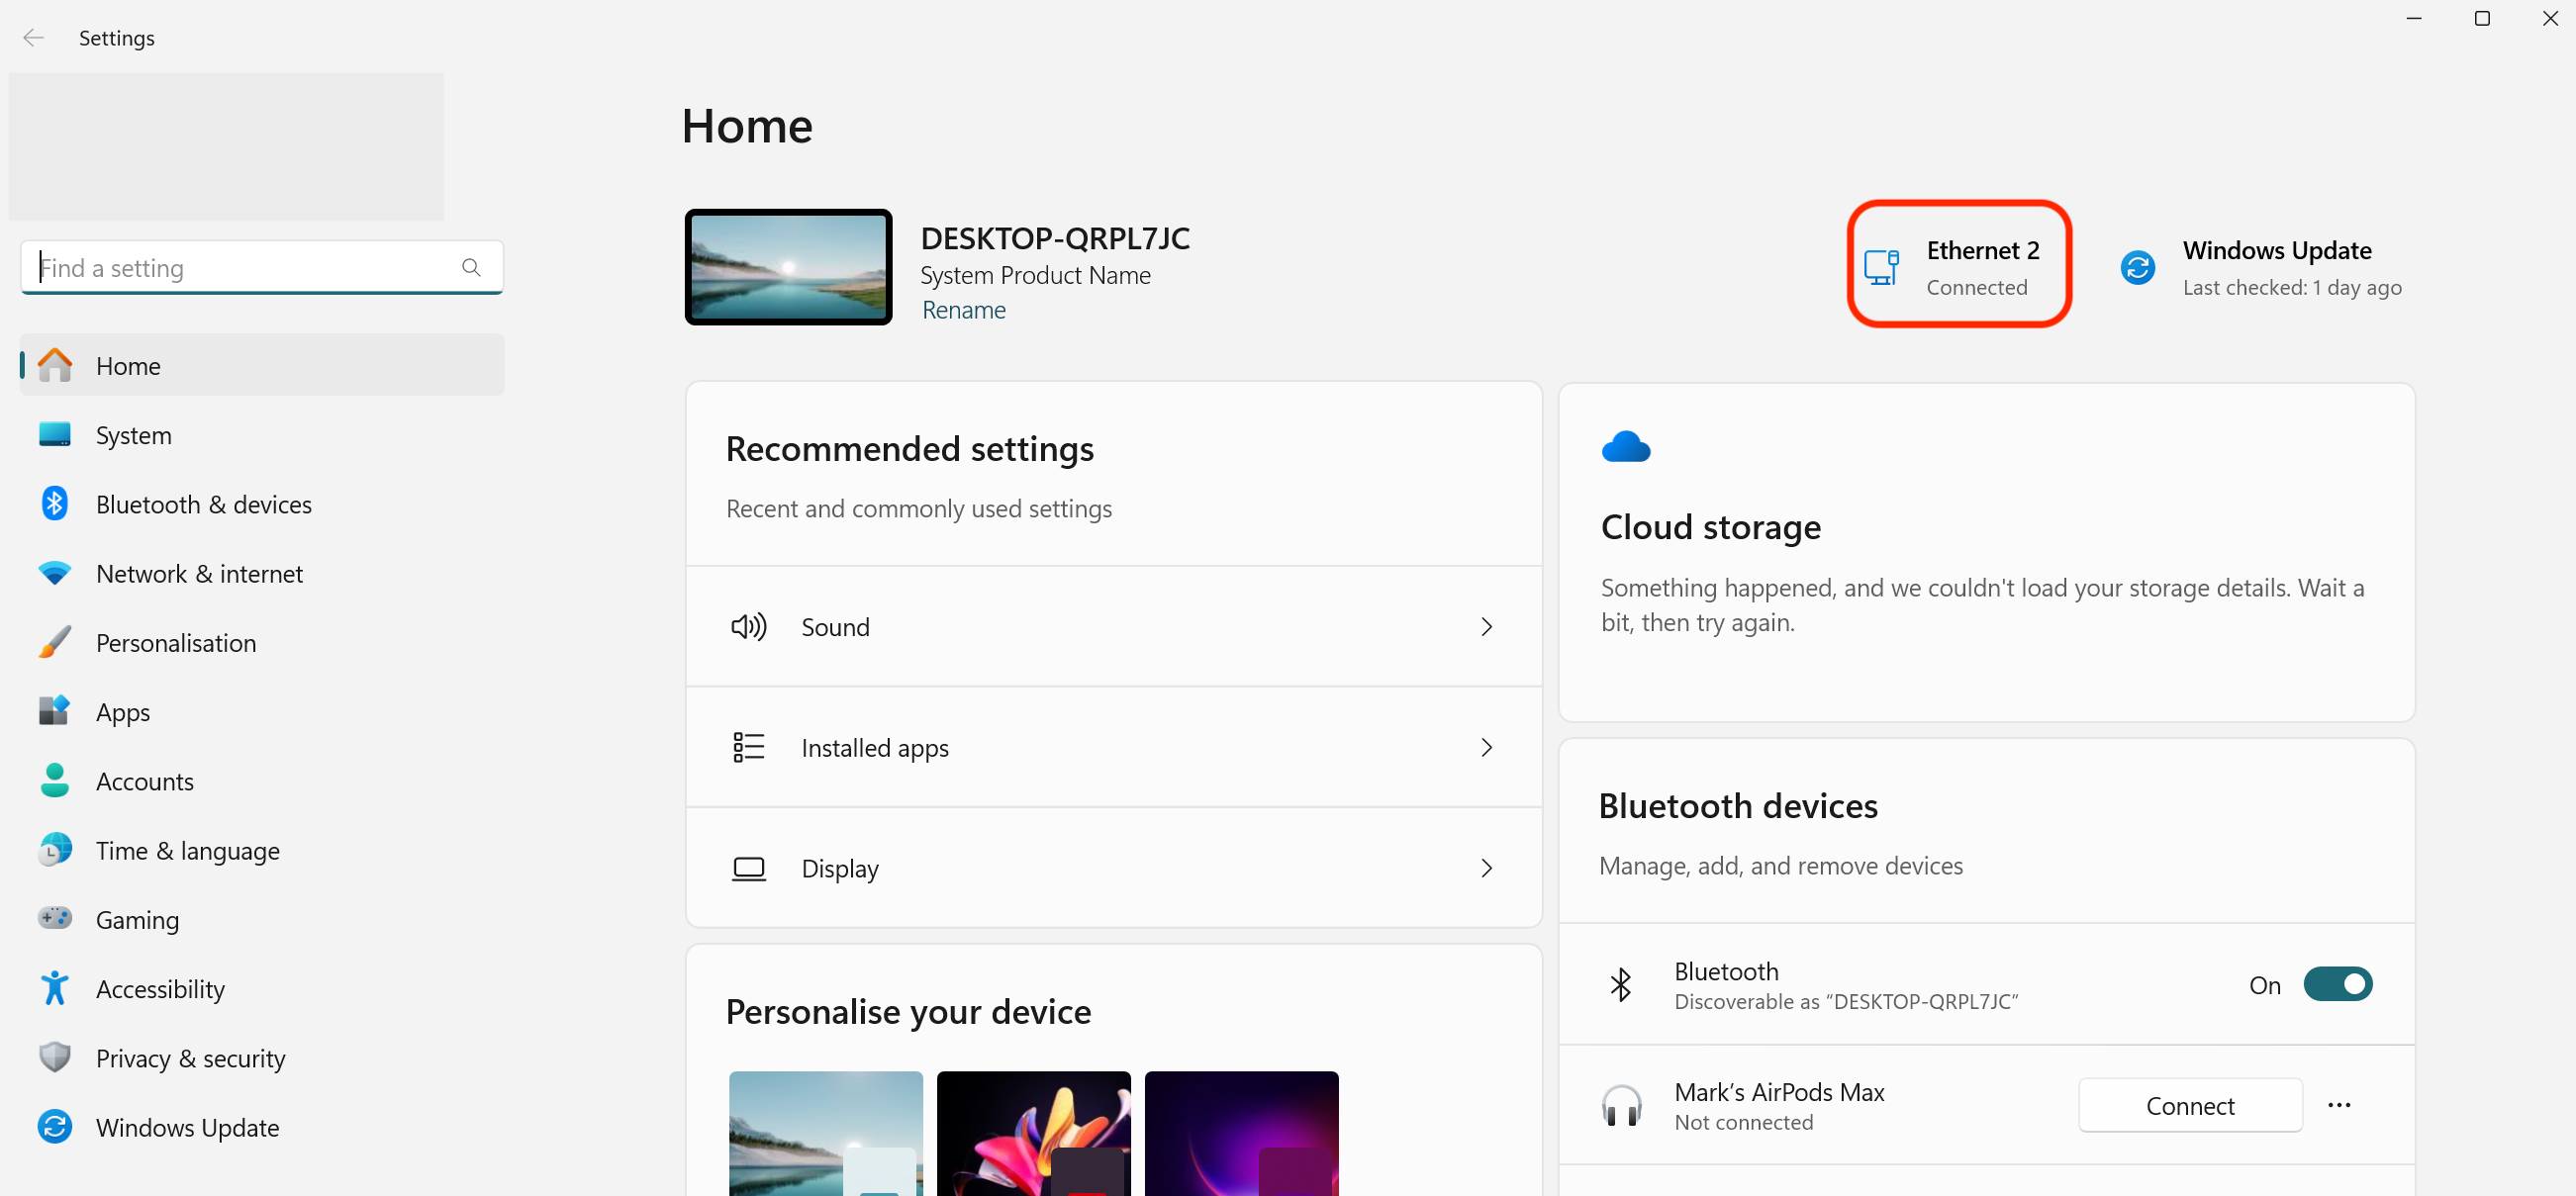
In System Settings, you'll see your current network adapter in the top right. Click it top open "Network & internet" Settings.
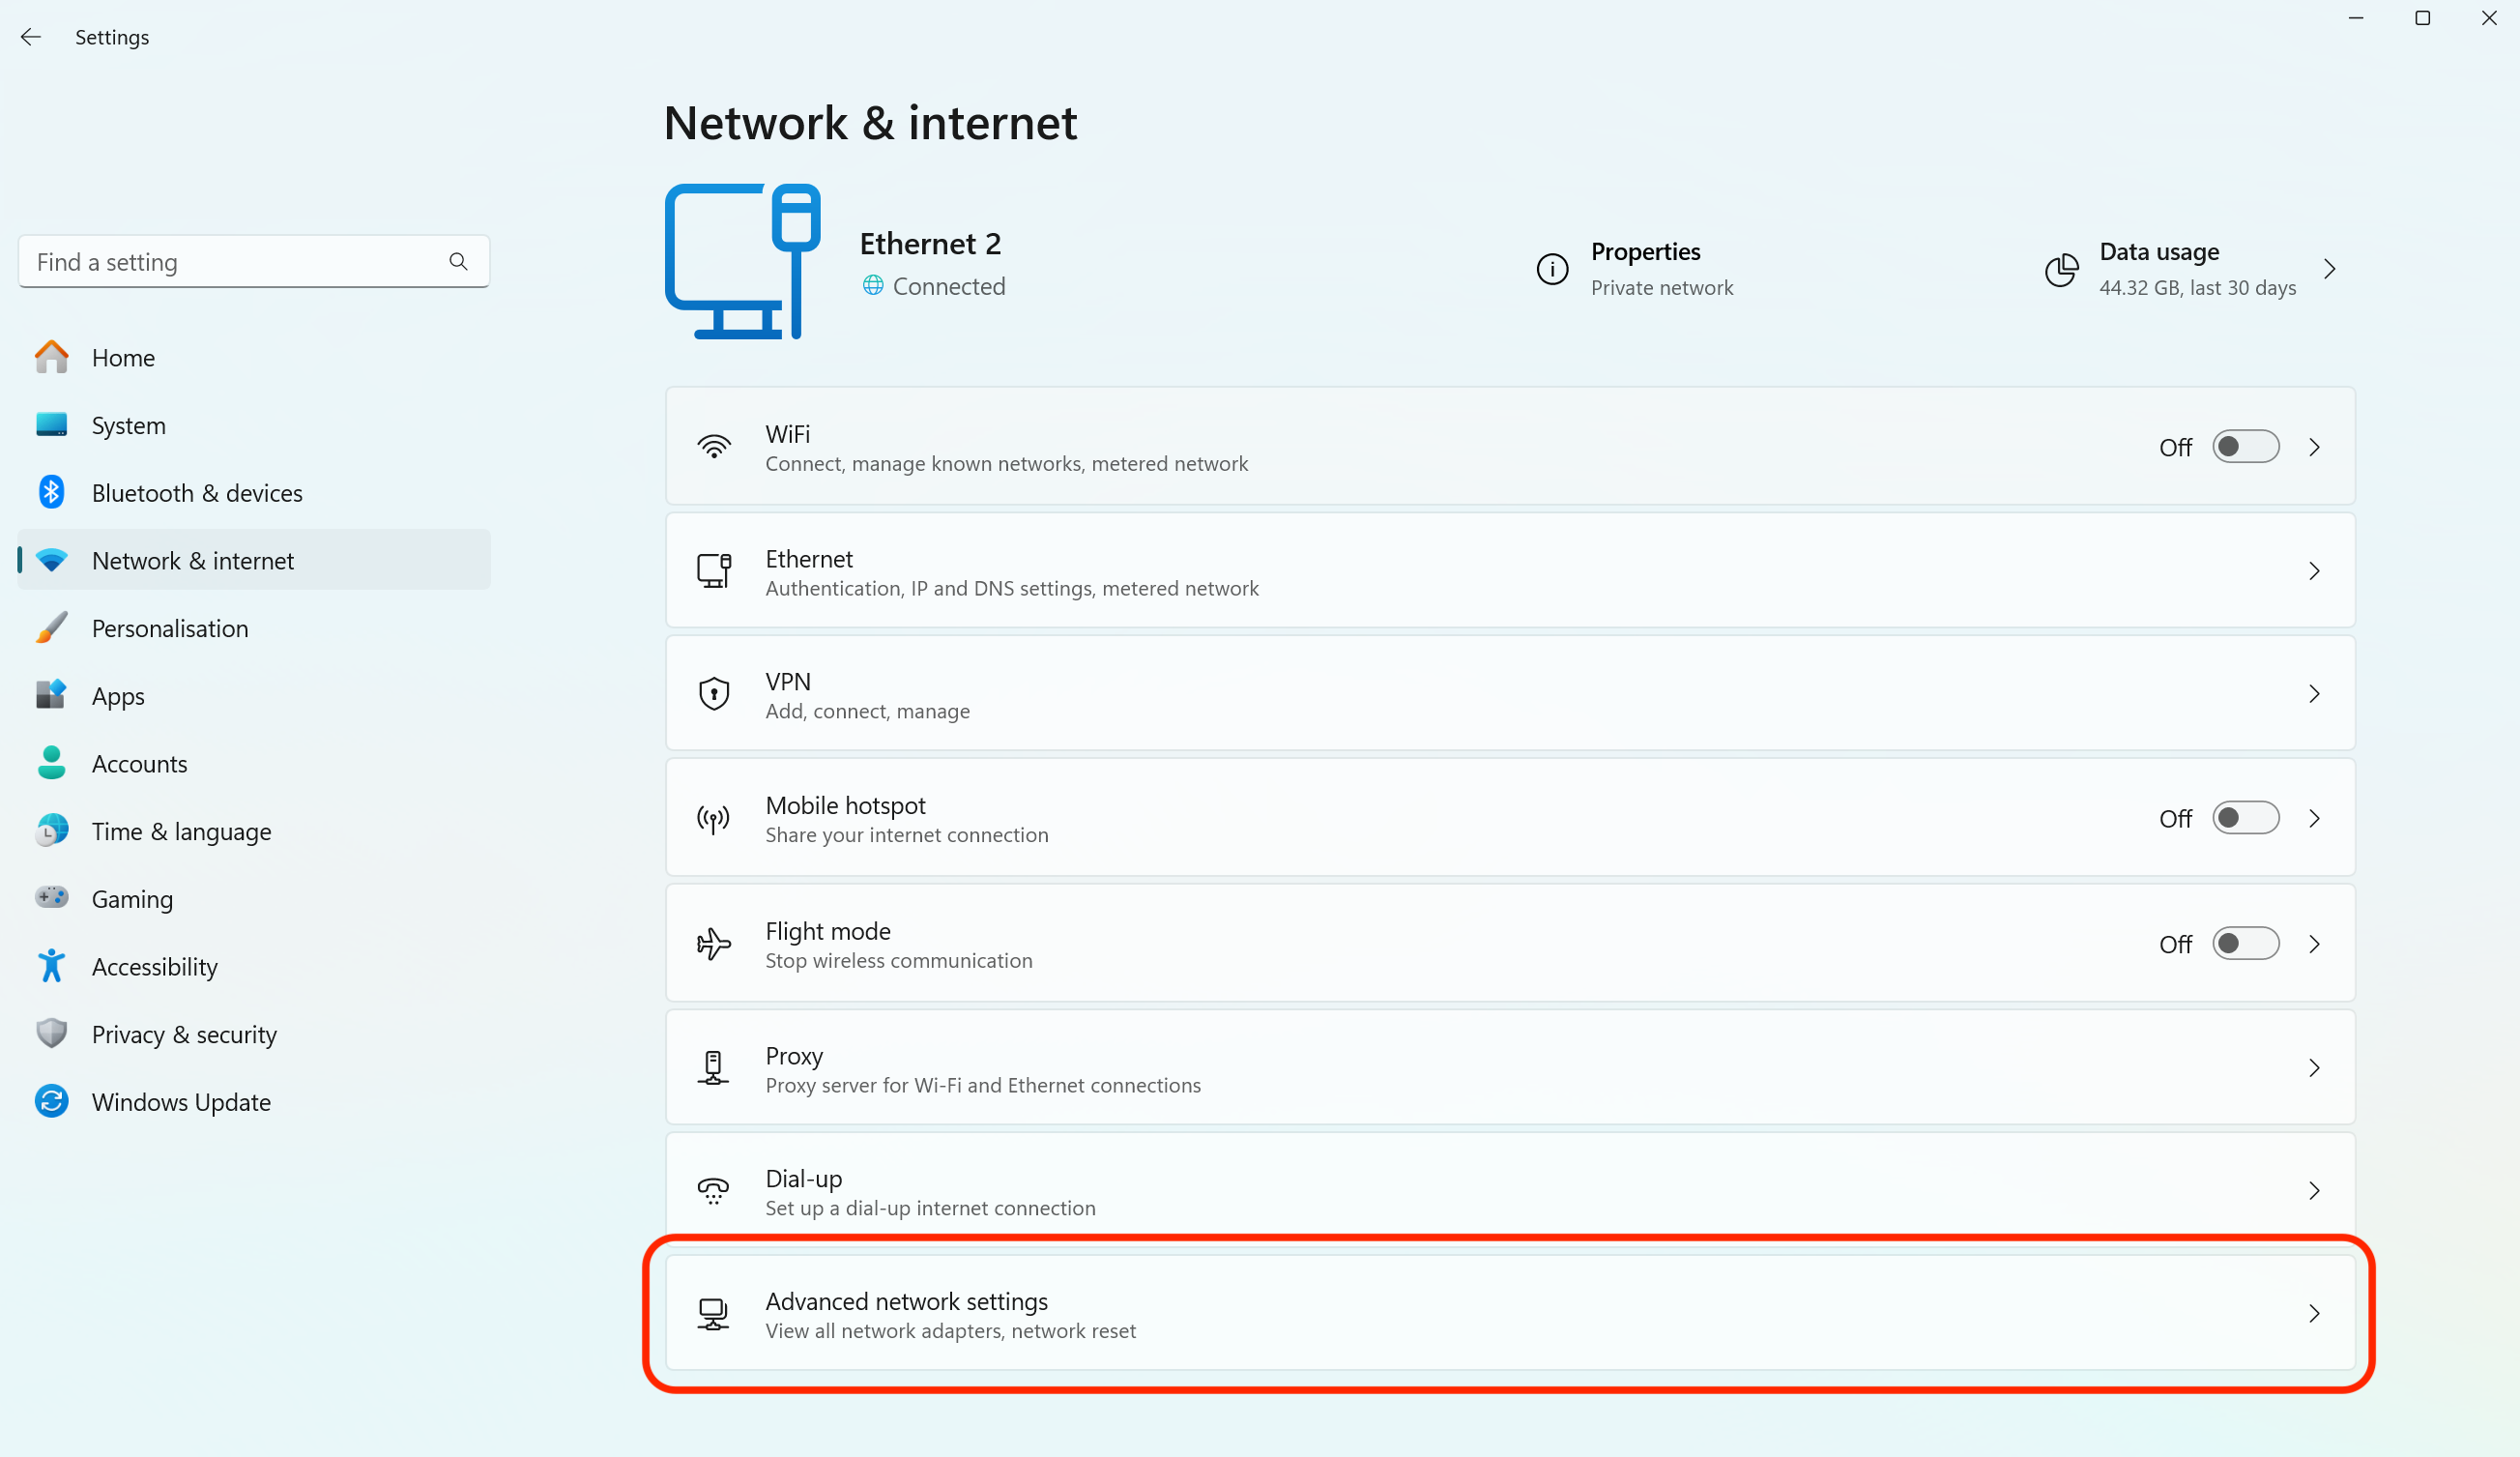
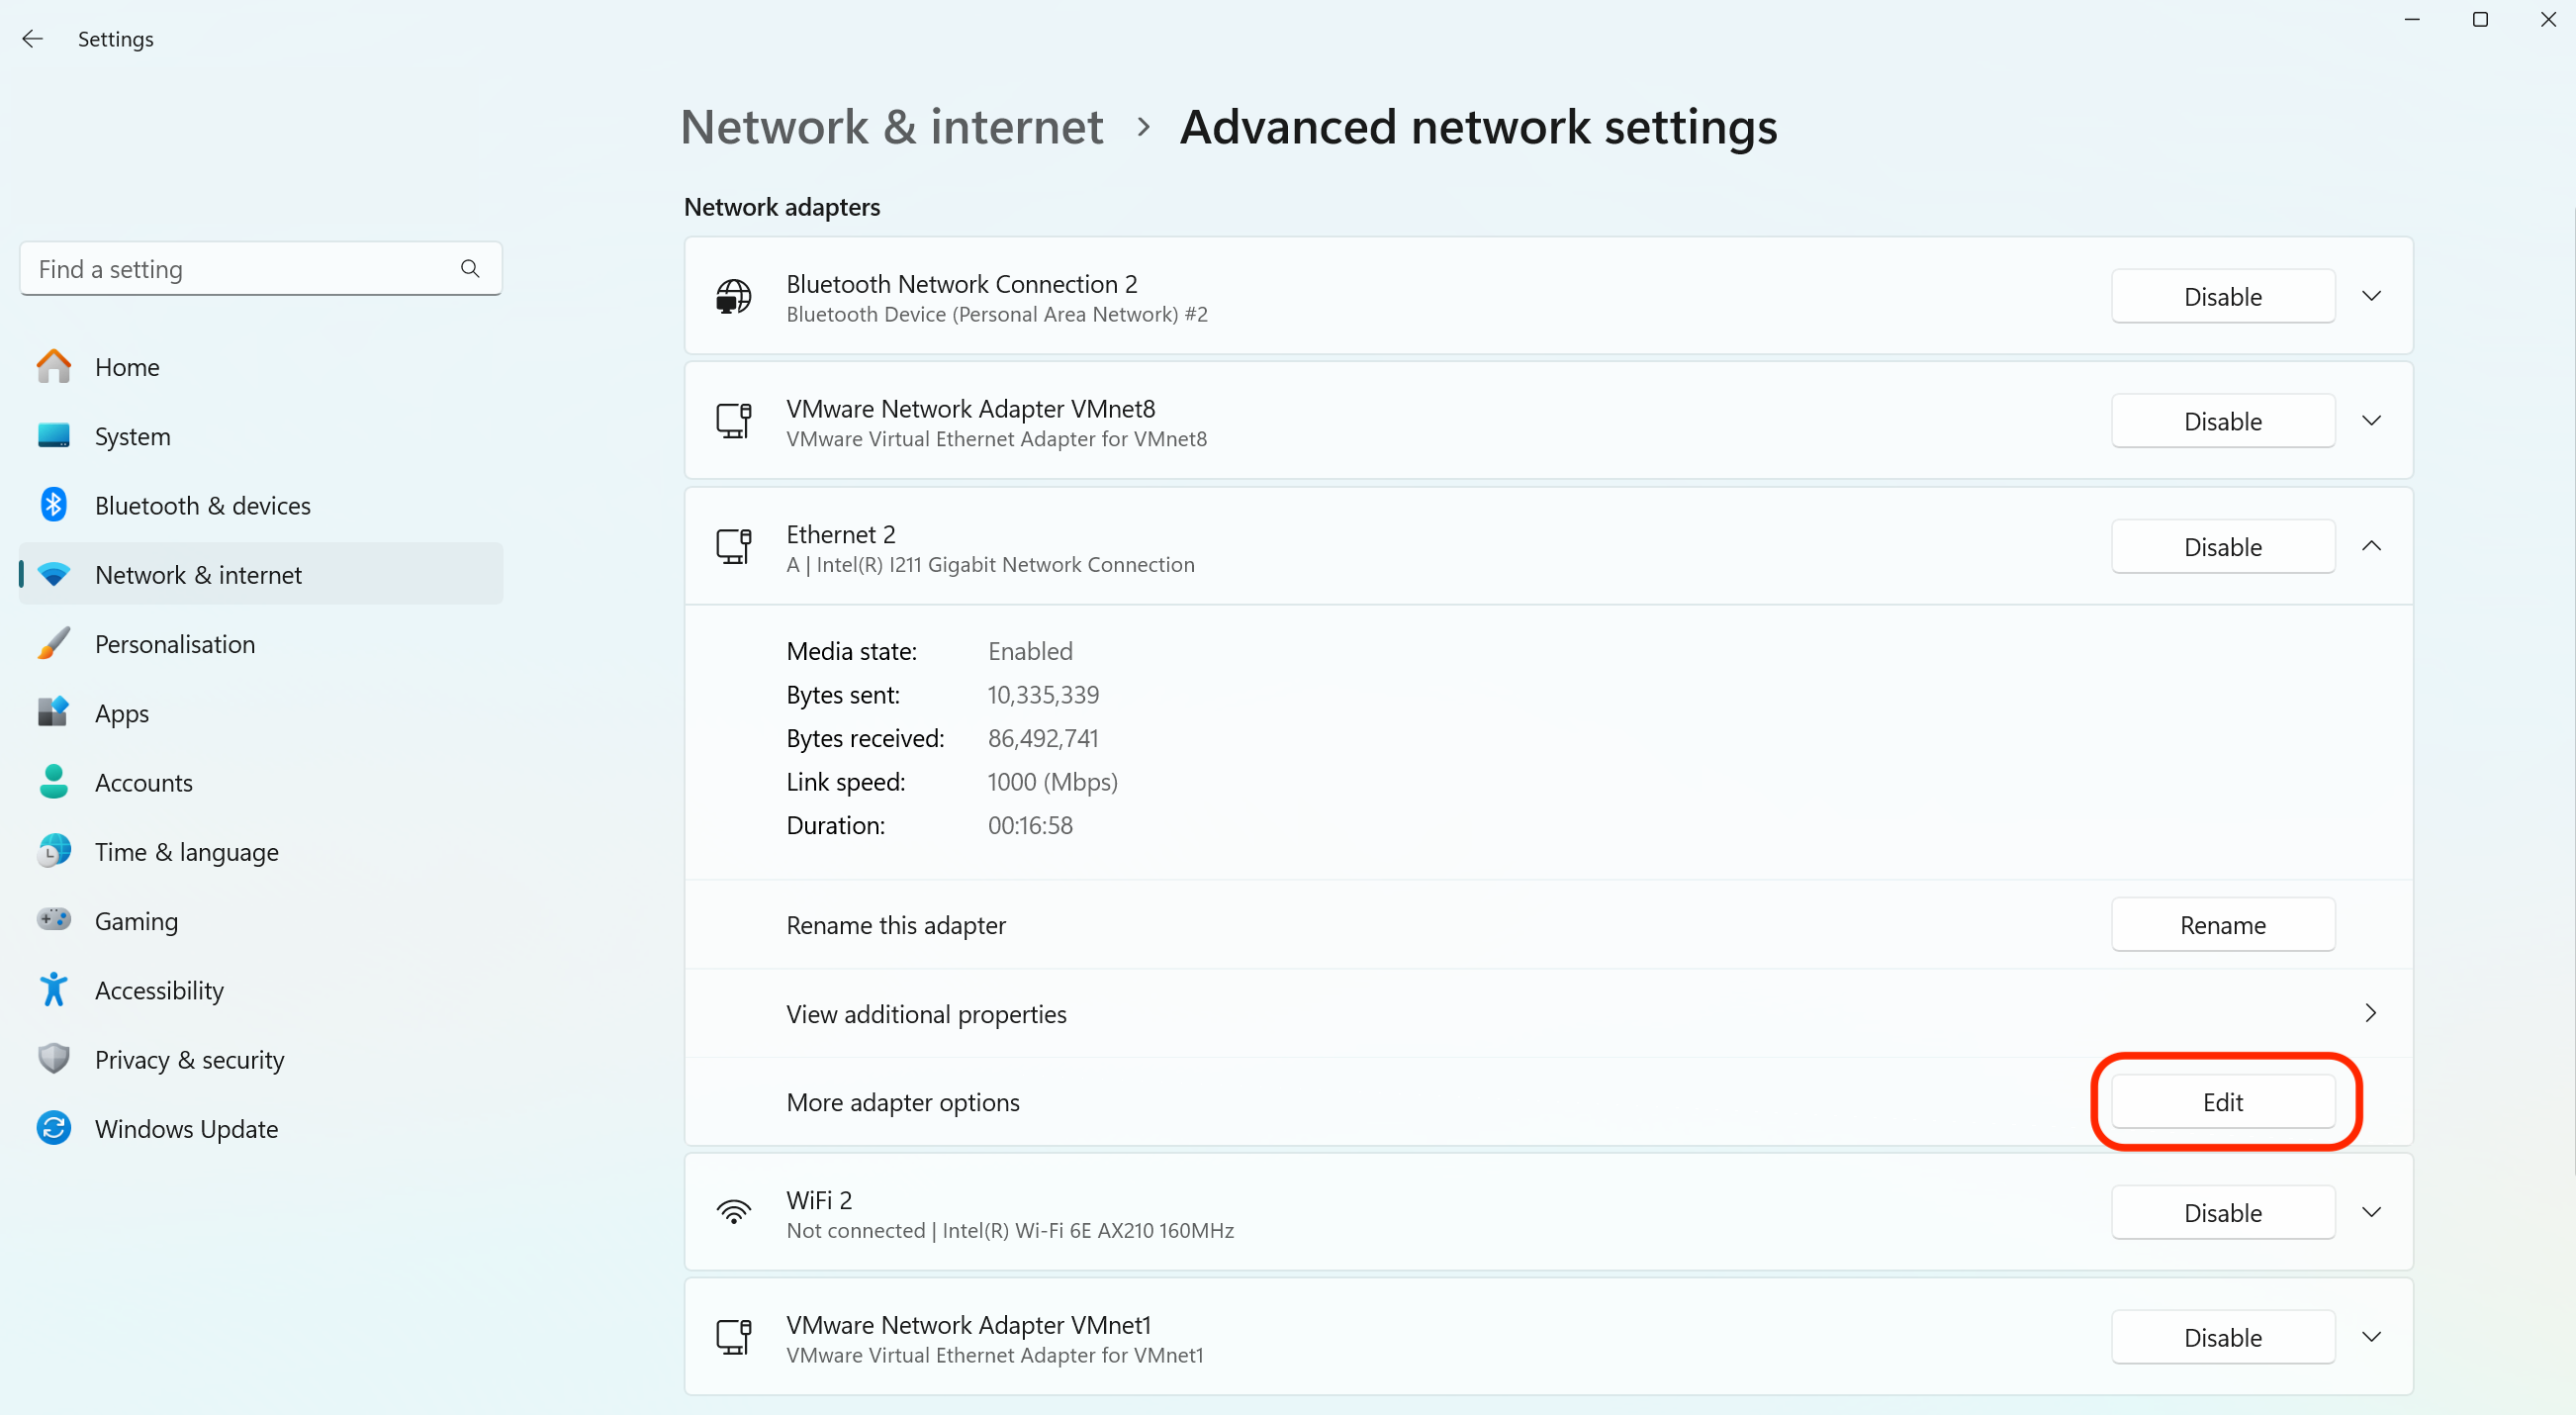
In "Network & internet" Settings, click "Advanced network settings".
Click on your network adapter to expand it (if you've got multiple the one to select is the one that was named back in System Settings). Where it says "More adapter options" click "Edit". This should bring up a new window.
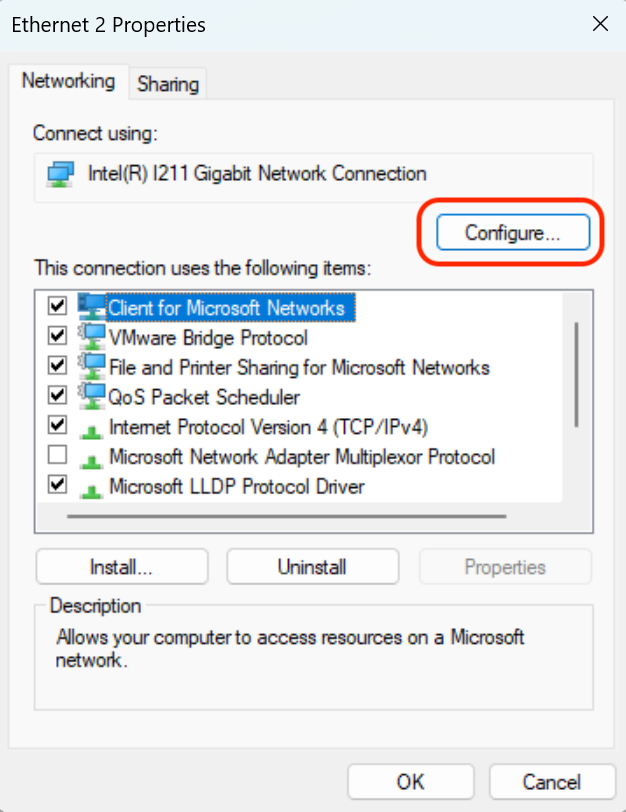
In the new window click the "Configure" button.
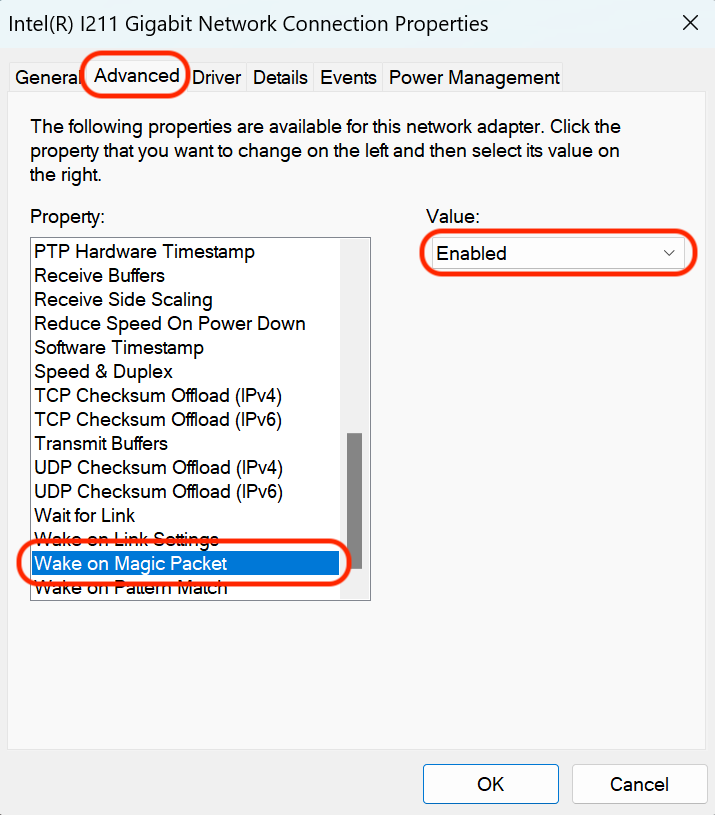
Click on the "Advanced" tab and scroll down until you find "Wake On Magic Packet". The "Value" needs to be set to "Enabled".
The exact name of the setting can vary between devices. If you can't find "Wake On Magic Packet", or similar, listed you need to update the drivers for your network card; it's likely you're using Windows default drivers, which don't offer full control of it. You should be able to find the full driver package from your motherboard manufacturer's website.
These additional properties may also need to be set if they are present.
- Shutdown Wake-On-Lan : Enabled
- Wake on pattern match : Enabled
- WoL & Shutdown Link Speed : 10Mbps
Click on the "Power Management" tab and ensure that "Allow the computer to turn off this device to save power", "Allow this device to wake the computer" and "Only allow a magic packet to wake the computer" are ticked. Now click "OK" to save the settings.

You should now be ready to put your computer into standby and use a WoL app, such as Off, to wake it.
Troubleshooting WoL
If you've followed the steps above but you've not been able to wake your computer through WoL try these troubleshooting steps:
- Confirm that the AC power is plugged in. WOL does not work when the computer is running on battery.
- If the ethernet port on your computer has lights on it, confirm that these lights remain on when the computer is powered off. If there is no link light, then the adapter has been powered off and there is no way for it to receive the magic packet to wake the computer.
- Ensure that WOL is enabled in the BIOS. This is usually found under the Power Management settings.
- Ensure that Deep Sleep is disabled in the BIOS (not applicable to all computers) as this power-saving setting turns off the network adapter.
- If you're using an ethernet dongle connected via usb, or similar, the computer may be powering this off when sleeping. Check if your BIOS settings allow USB devices to remain powered on in sleep.
- Try adjusting your system's sleep level in the BIOS. These sleep states should be referred to as S1-5 and set different levels of powering down components.
It may be necessary to boot to the Windows desktop after changing the BIOS settings in order for them to be properly applied.
Enabling WoL via The Internet
WoL can also be used to wake up your computer when you're outside of your own home. Before you try this make sure you've confirmed you're able to wake your computer on your local network as if it doesn't work locally it's not going to work via the internet either.
To wake your computer over the internet you'll need to configure your router to allow the the WoL magic packet through and to forward it onto the computer you want to wake.
Logging Into Your Router's Admin Panel
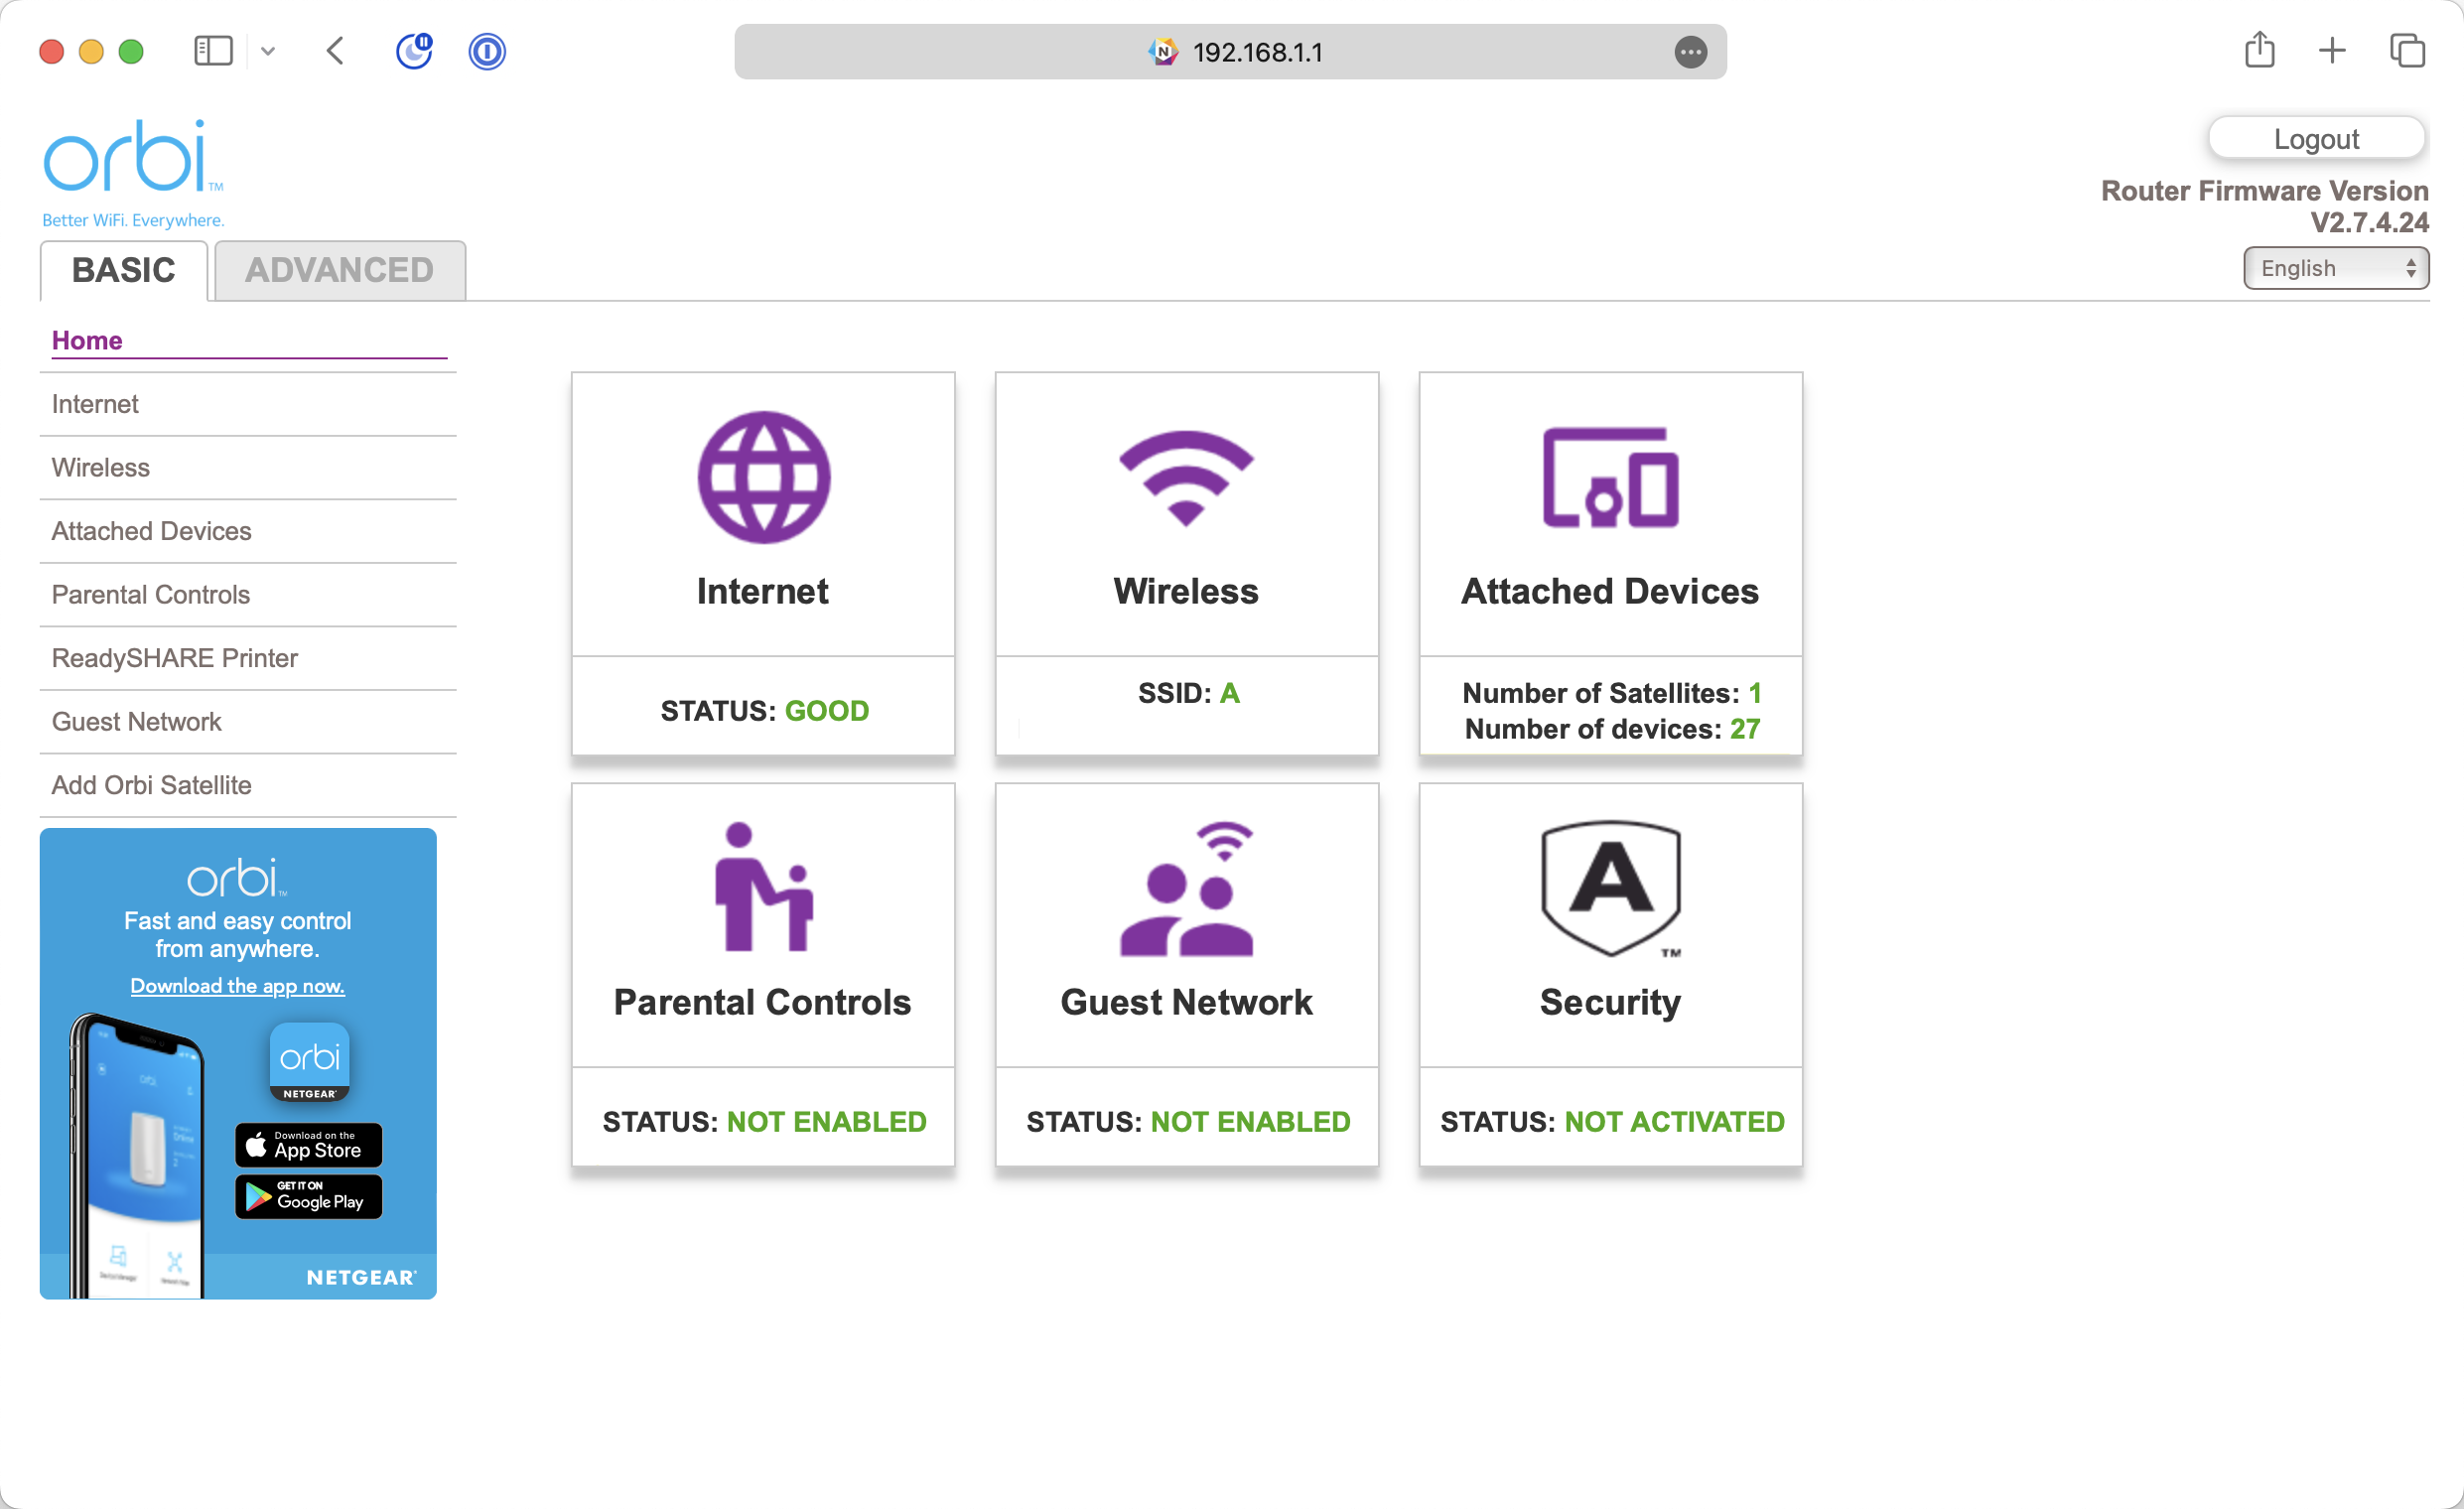
To configure you're router you need to log into it's admin panel. This can be accessed by entering it's IP address in your web browser. It's usually 192.168.0.1, 192.168.1.1 or 192.168.1.254 but it can vary by manufacturer. You'll need your username and password to log in. If you don't know what it is already you can usually find it written on your router. Some models may have a default password set, which can look up here.
Configuring Your Router with UPnP
If you're using the Off Helper it will automatically attempt to setup the necessary port forwarding on your router using UPnP. It's therefore worthwhile to check if this was successful by turning off wifi on your phone and attempting to wake your PC over your cellular connection to see if any additional configuration is needed.
If you're still reading it's not worked and you're going to need to make some changes in your router's settings. UPnP is turned off by default on most routers.
Router admin panels vary a lot between manufacturers and models. In this one, the UPnP checkbox is located under Advanced Settings.
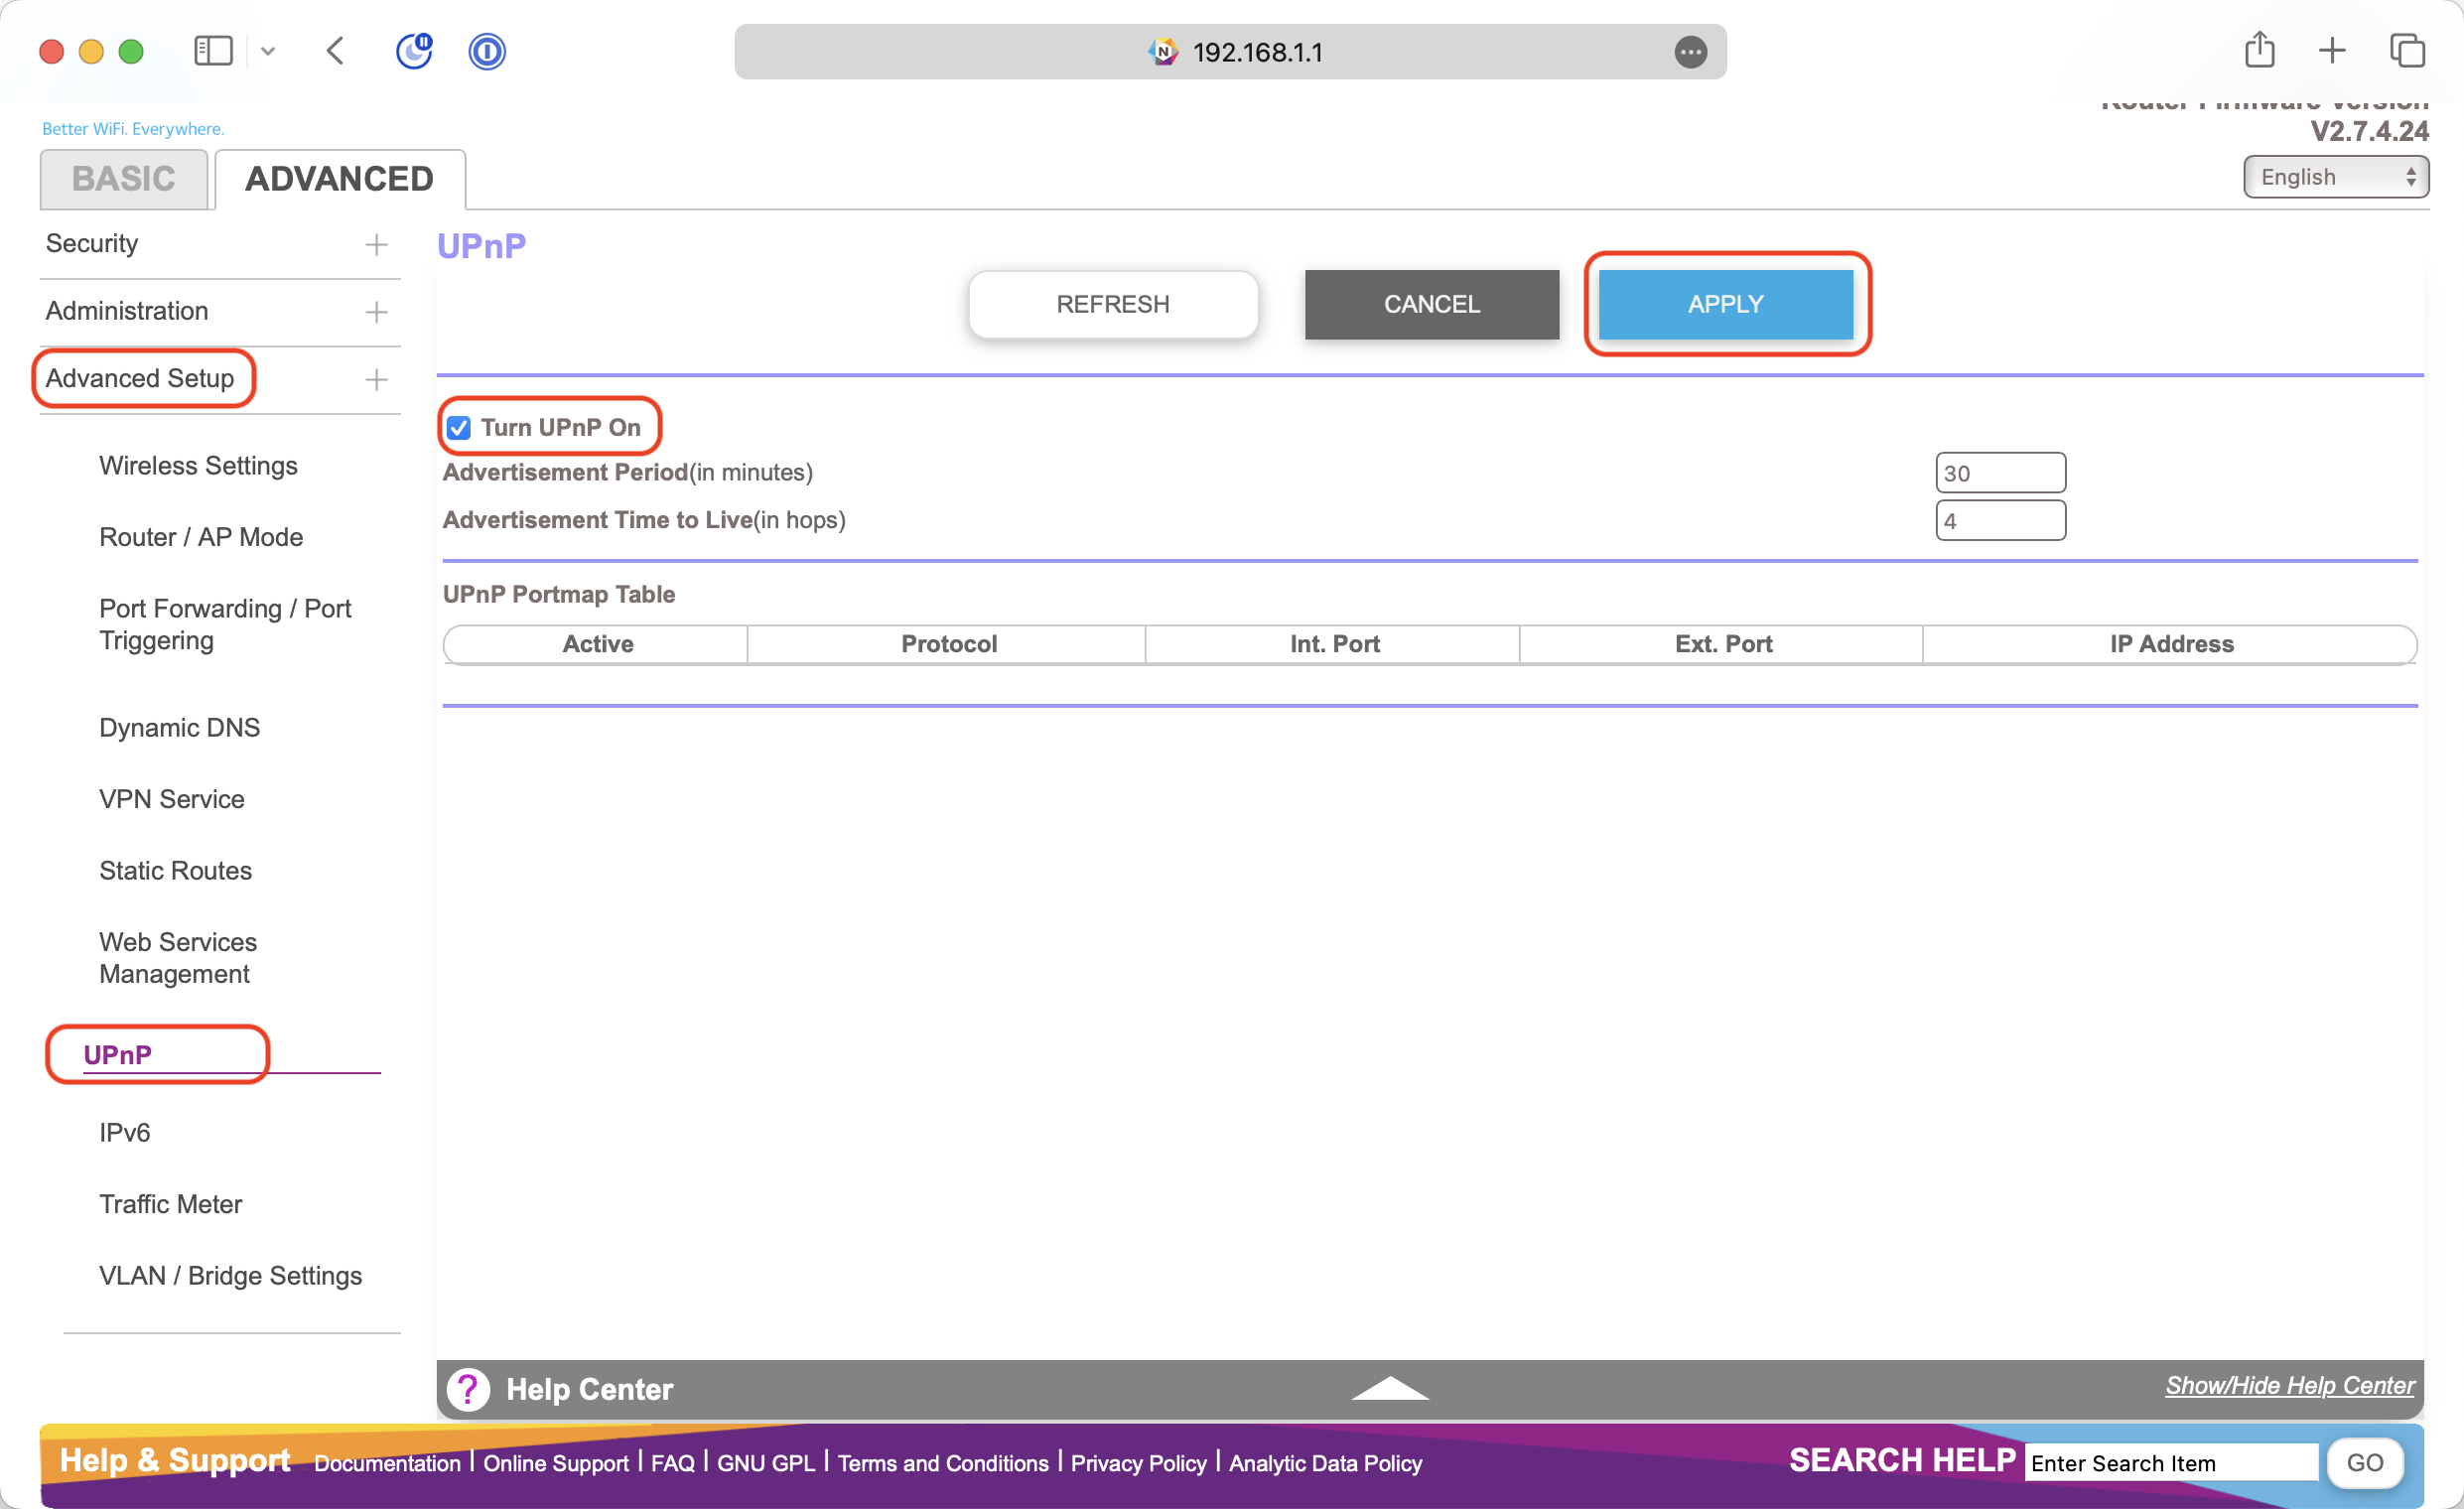
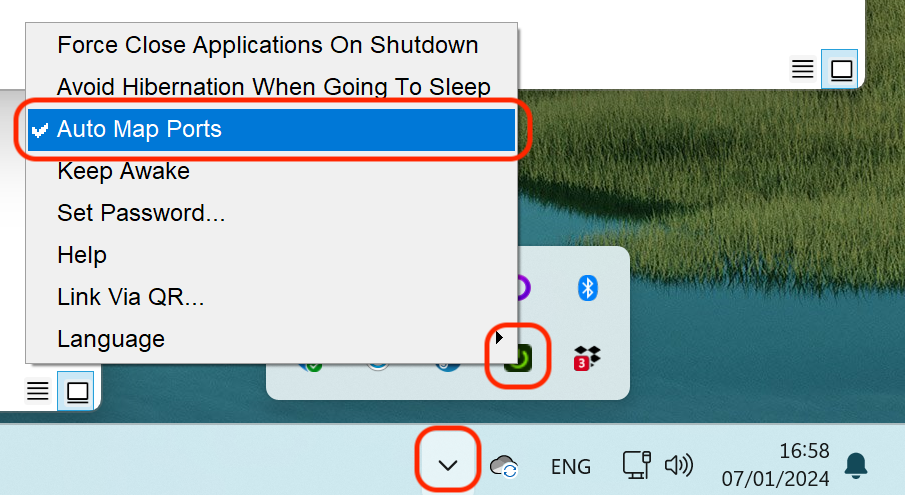
Once you've turned it on and made sure the settings have been applied, you can then retrigger the Off Helper's auto port mapping by clicking on the Off Helper icon in the menu and toggling Auto Map Ports on and then off again.
Configuring Your Router Manually
If UPnP setup didn't work, or you'd prefer to configure your router manually, then these are the steps to do so. Again, where you'll find the relevant settings in your router's admin panel is going to vary but this should give the general idea.
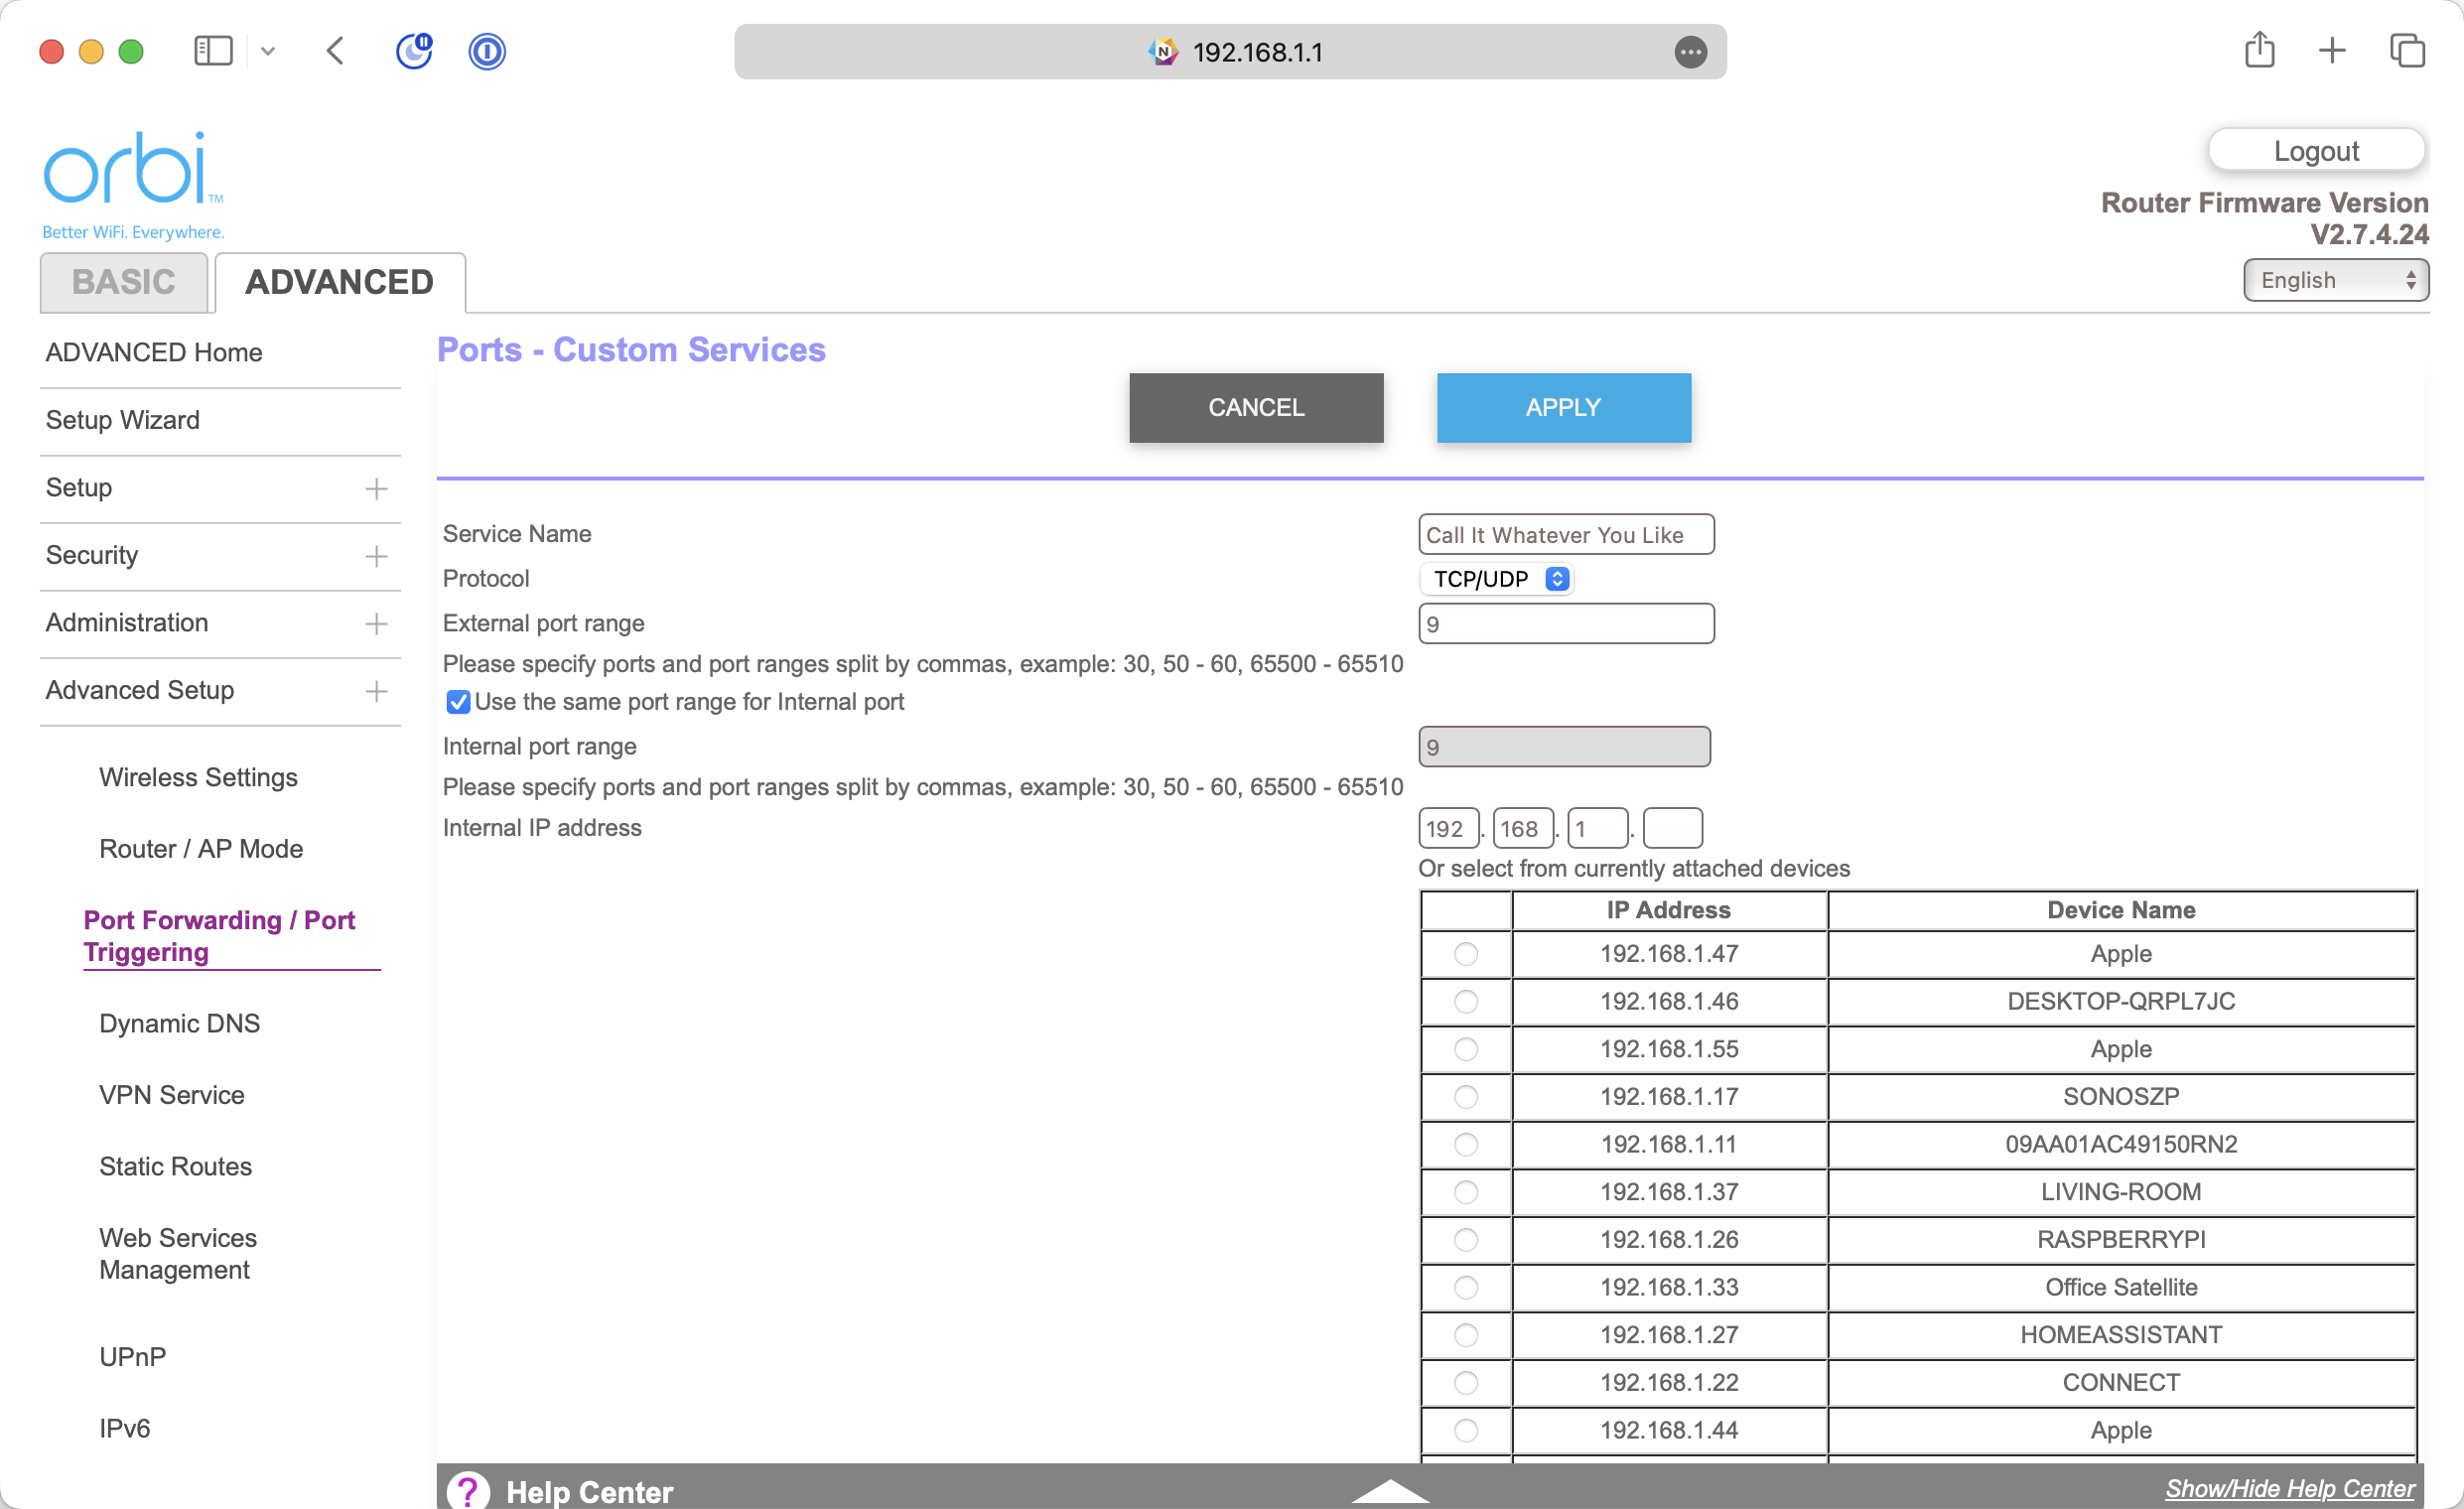
In the admin panel, find the Section on Port Forwarding. The default port for WoL is port 9. You'll need to add a new rule to forward port 9 to the IP address of the computer you wish to wake. Your internal port should be 9, your external port should also be 9 and you should select to use the TCP and UDP protocol.
It's rare but, some routers allow forwarding to the broadcast address. The broadcast address is your computer's IP but with the last set of numbers changed to 255. For example, if your computer's IP is 192.168.0.20 then forward to 192.168.0.255, or if it's 10.10.10.15 forward to 10.10.10.255. If your router accepts this as a valid address then using this may be preferable to forwarding to your computer's specific IP as it avoids needing to worry about the IPs of individual computers.
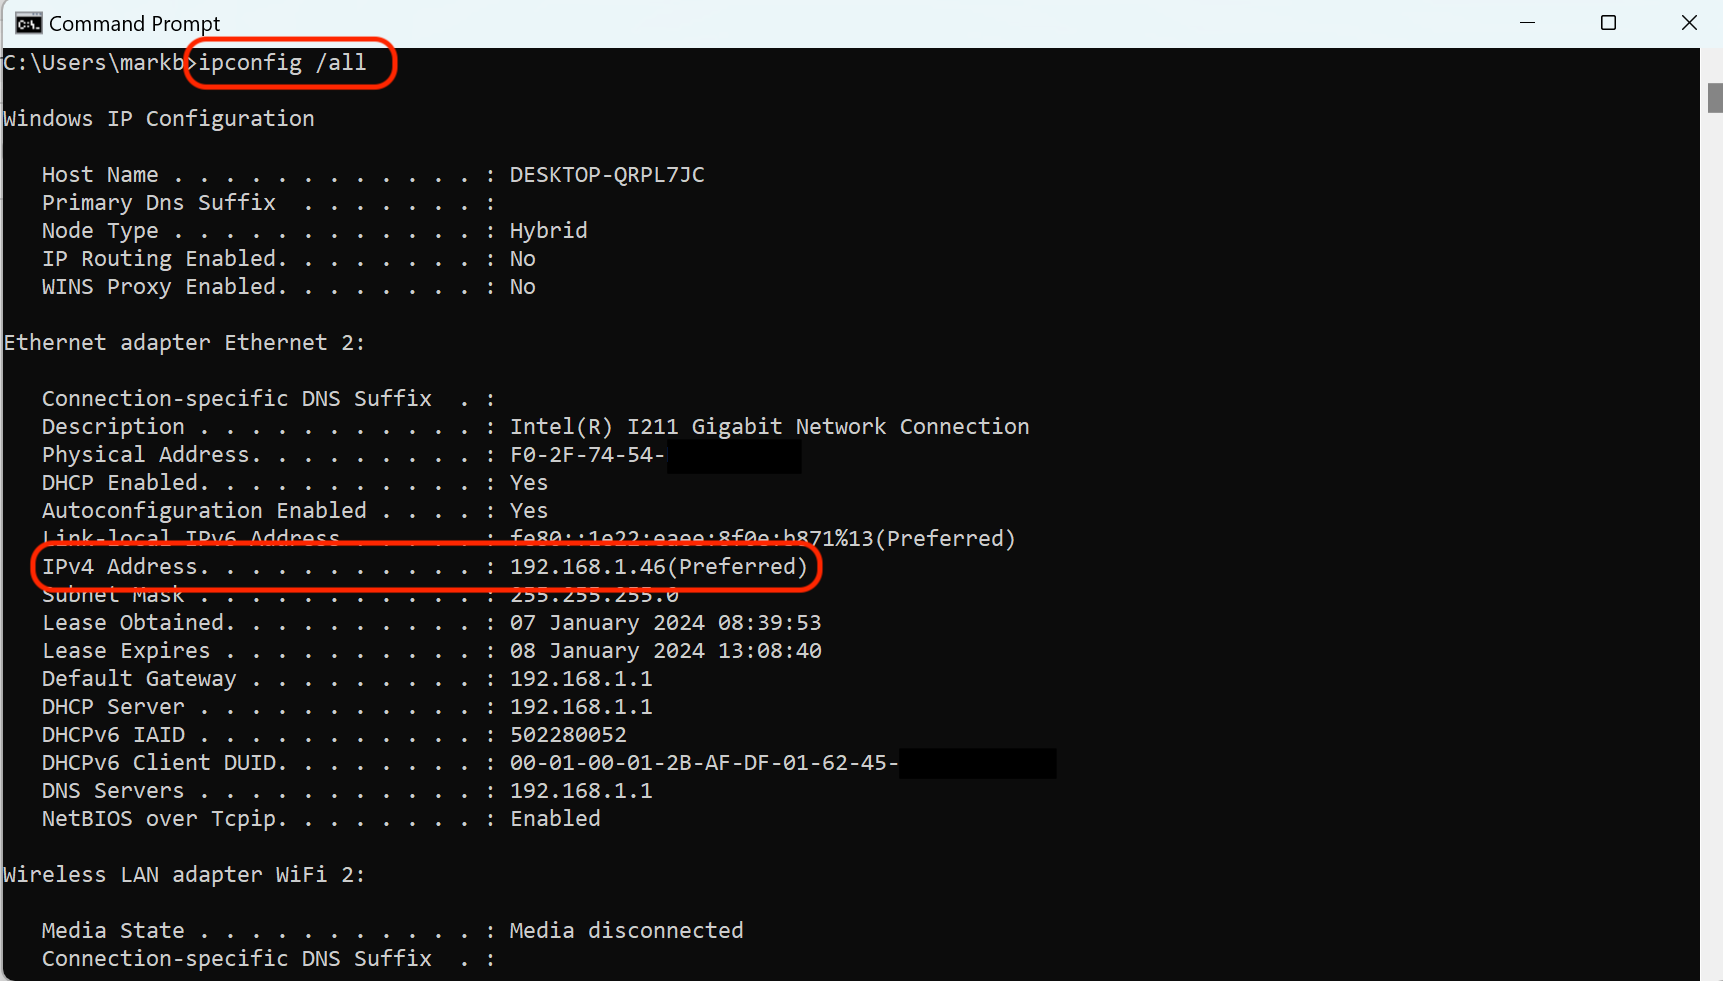
Hopefully, you will have found your computer, along with it's IP address, listed on the the Port Forwarding entry screen. If your router doesn't display it you'll need to find out what IP address it's using. One way of doing that is, on the computer, open the Command Prompt.
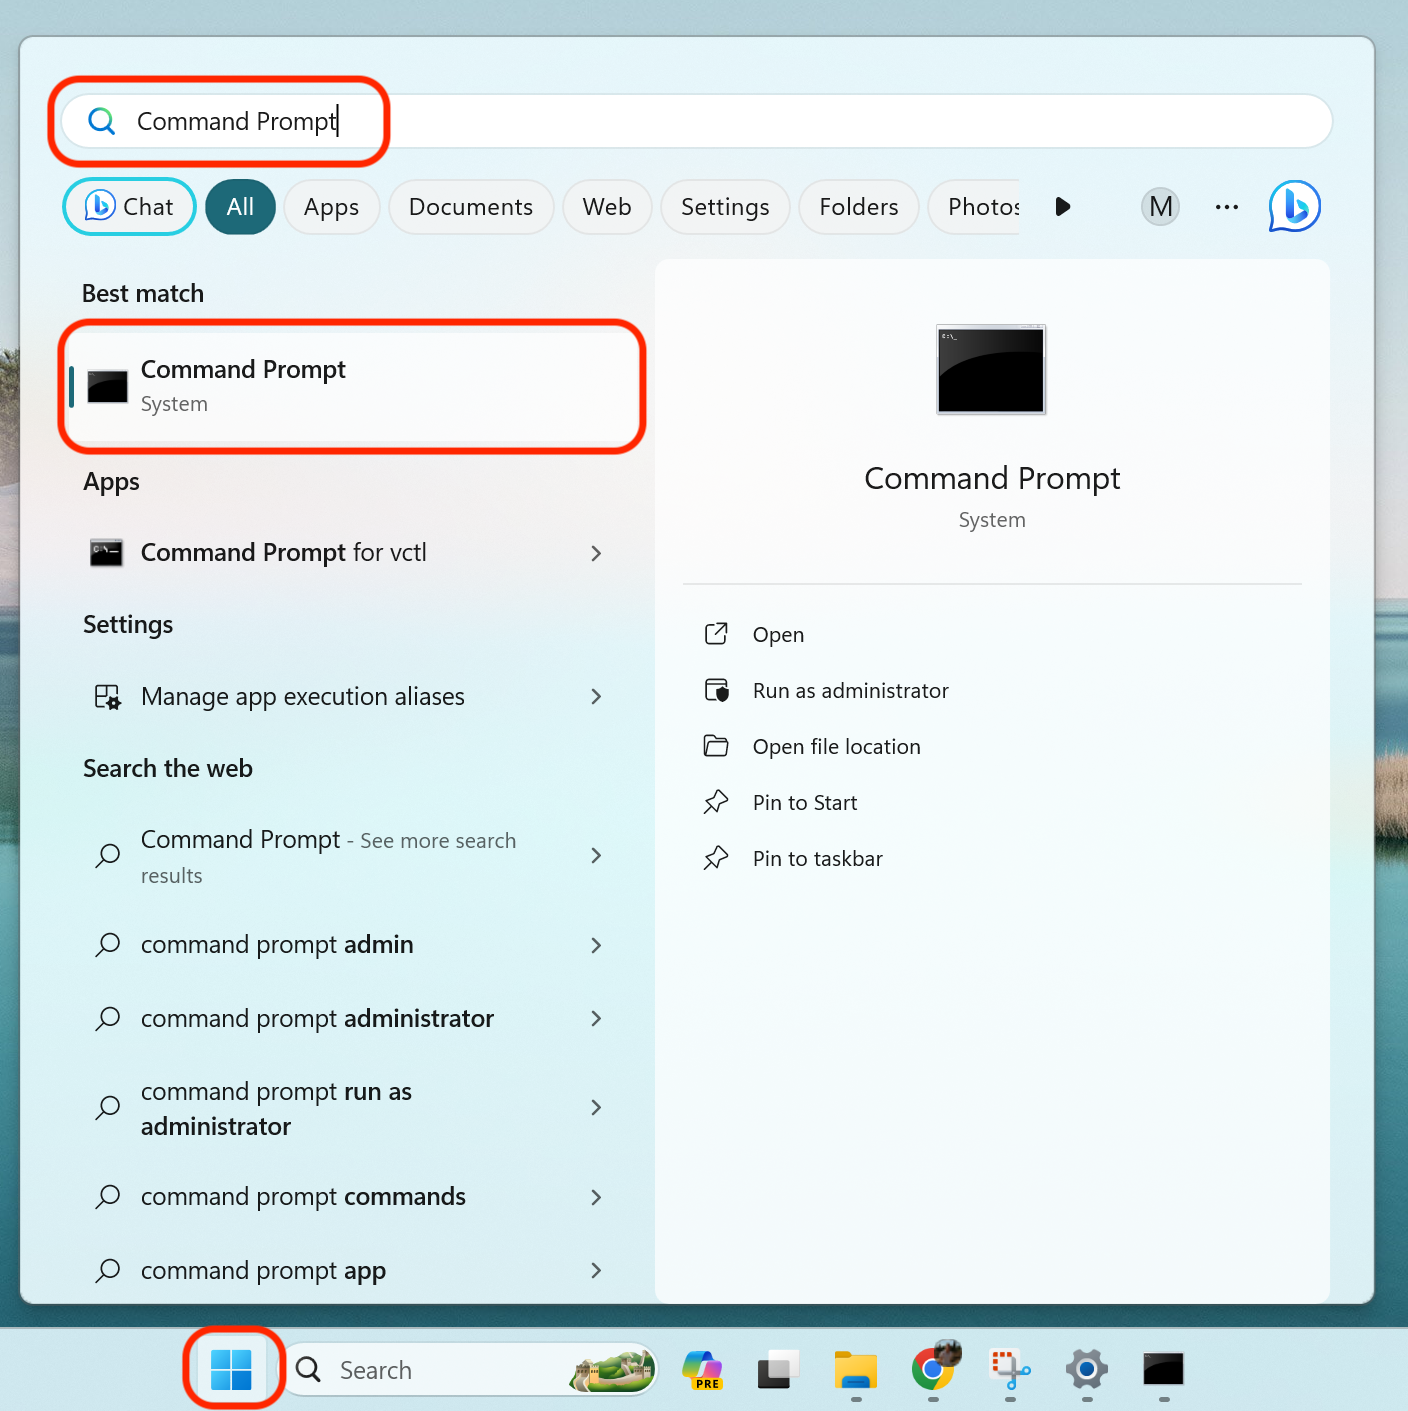
In the command prompt type 'ipconfig /all' and hit enter. This will list out all the info about your network connections. In here you'll find your local IP address listed next to "IPv4 Address".
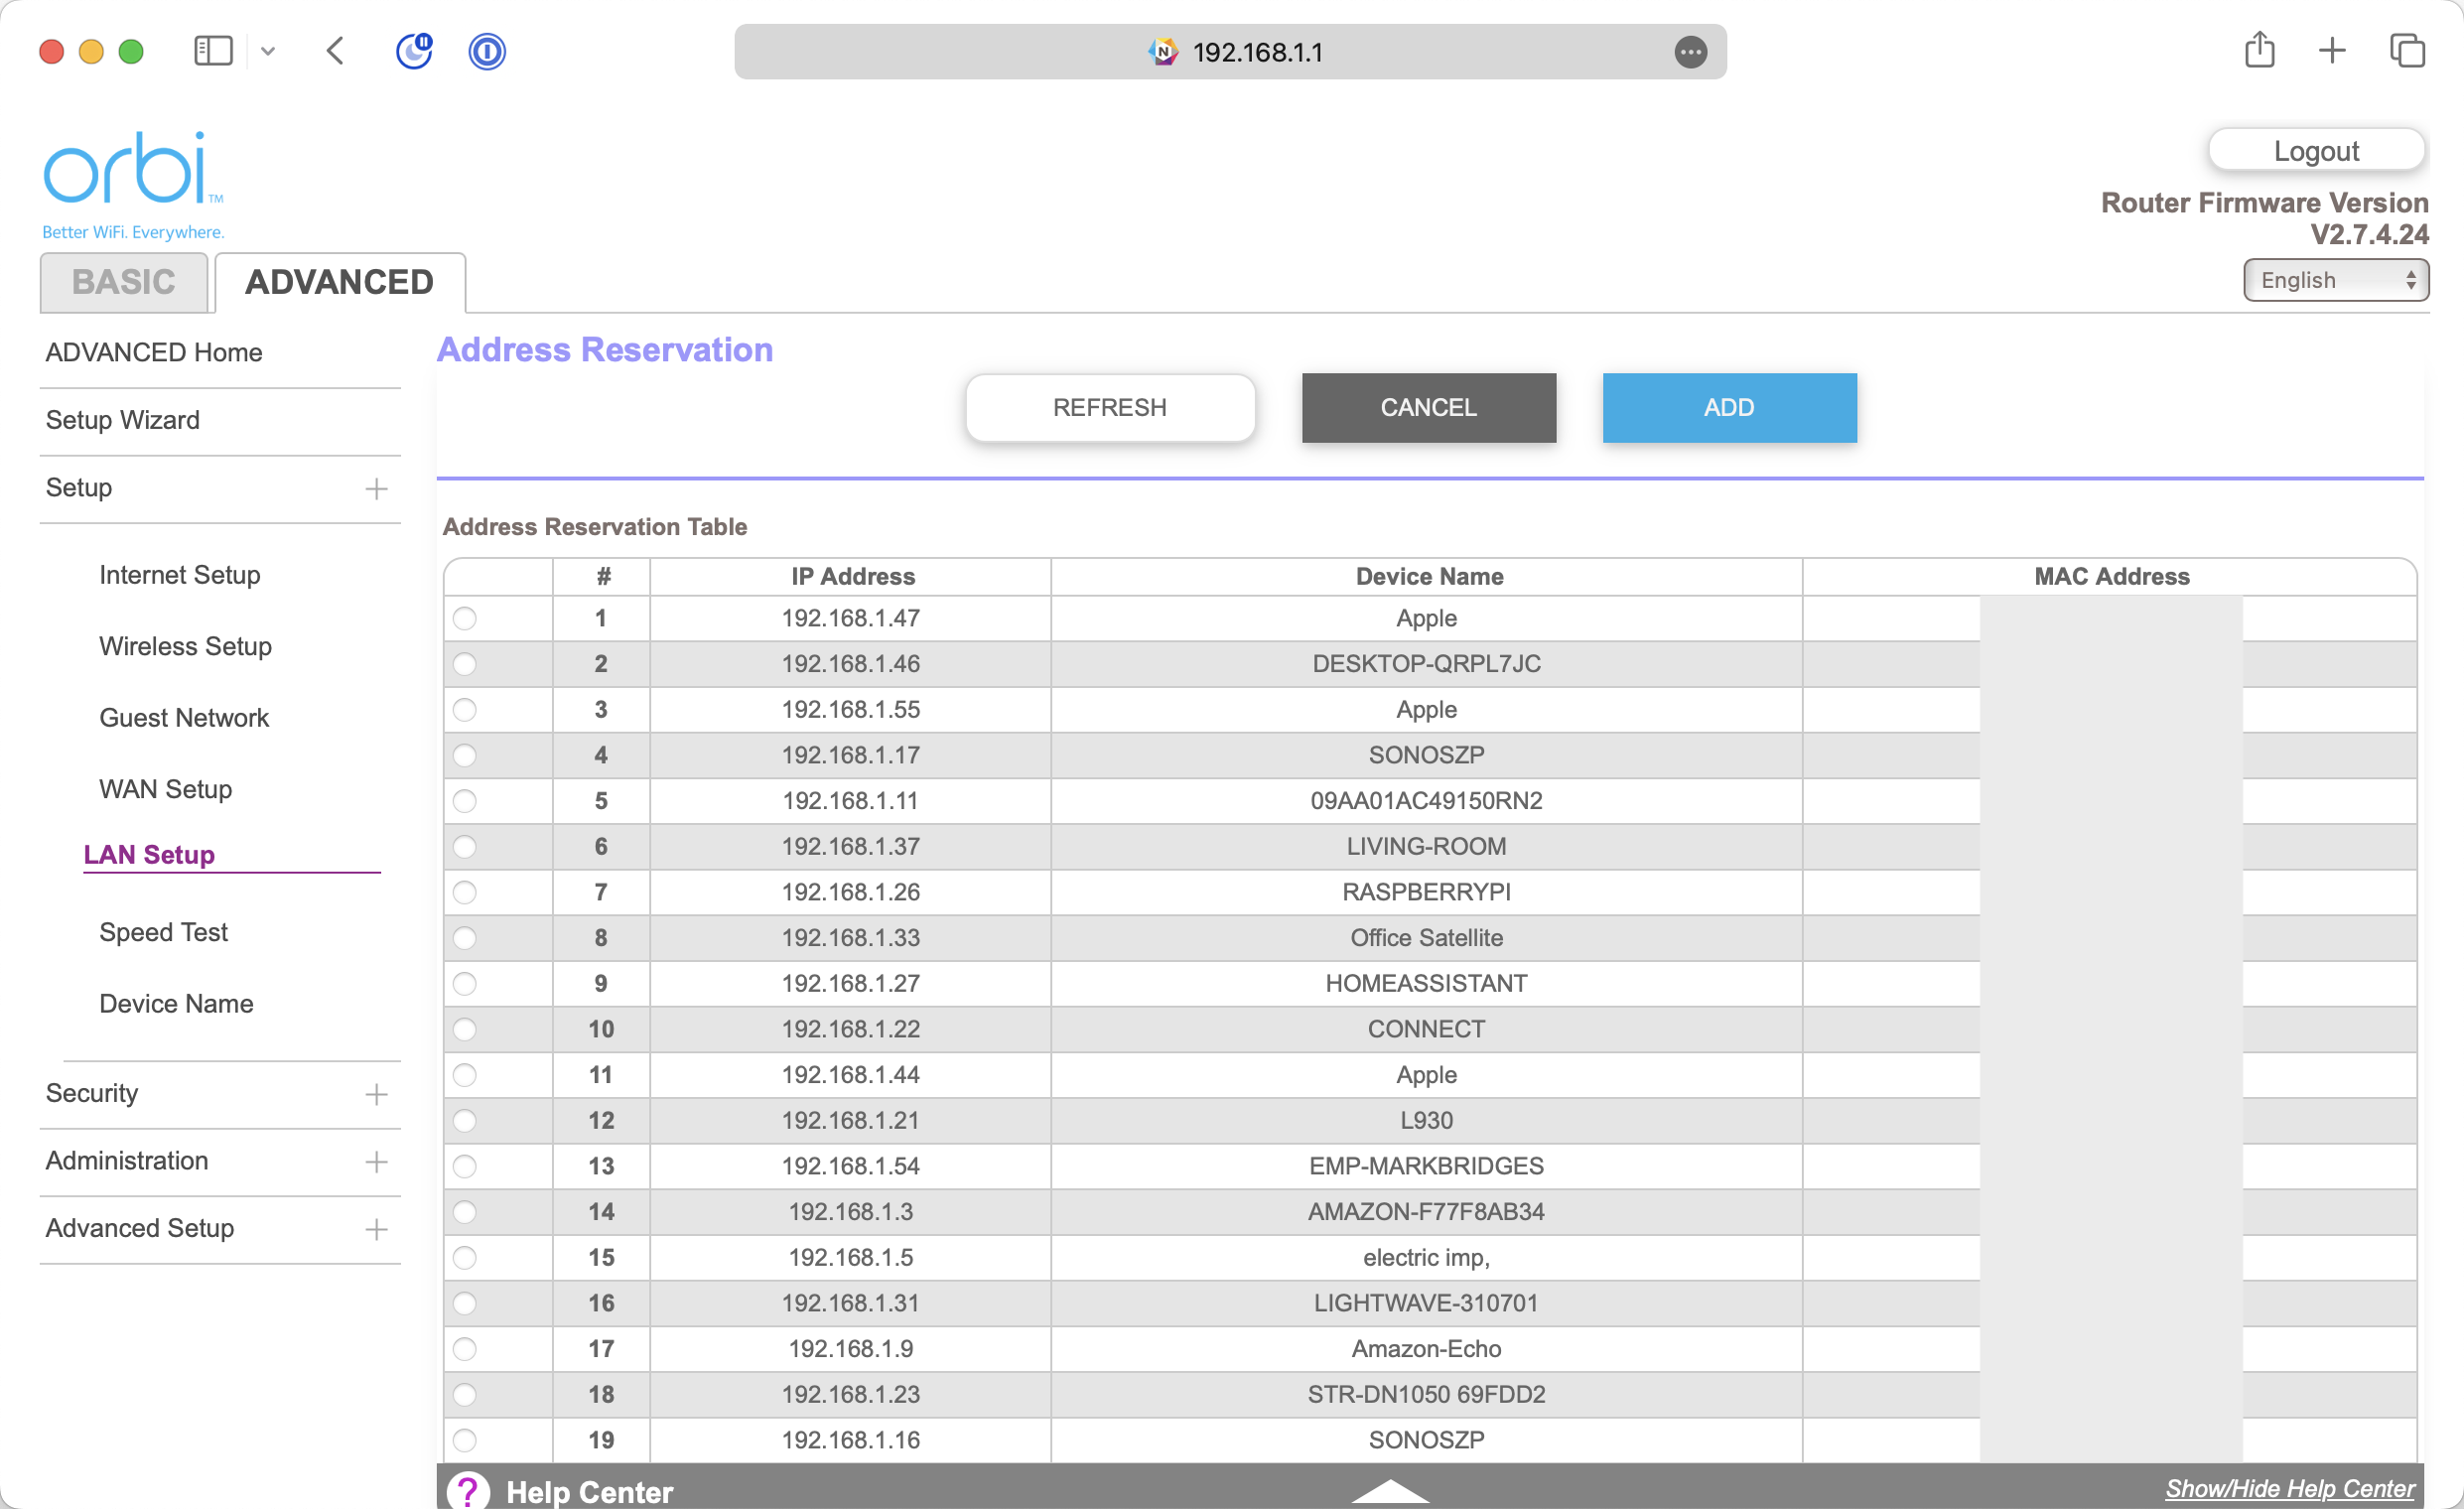
Configuring Port Forwarding should be enough to get WoL working. However, from time to time your router may change the IP address of your computer. If that happens your Port Forwarding configuration could no longer be valid. To avoid this situation you can tell your router to reserve this IP address solely for use by this computer.
Where you'll find this in your router's Admin panel will vary. It should be called something along the lines of Static IP addresses or Address Reservations. You should be able to either select your computer from a list of devices on your network or, if that's not available, enter in the information obtained from 'ipconfig /all' in the Command Prompt.
You router's manufacturer should have the manual for your router available on their website should you need more help finding or configuring it. Another useful resource is openmyip.com.
To confirm everything's setup correctly now, you can use this Open Ports Checker. It should pickup your public IP address automatically. Enter the port you just opened and confirm it's reported as Open in the tool.
Your computer should now be able to recieve WoL Packets over the internet.
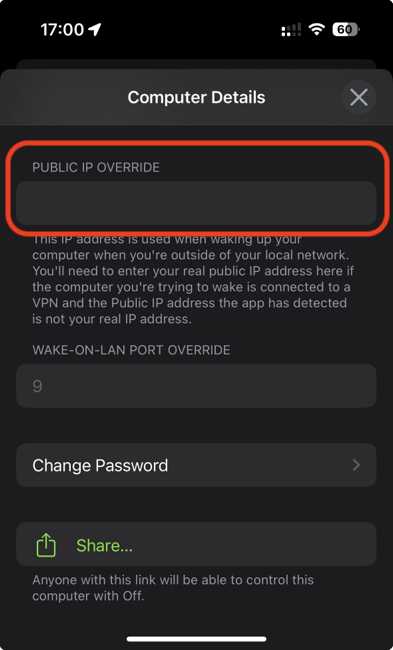
If you've got multiple computers on your home network that you want to be able to wake up you can repeat the steps above providing a different external port each time. Your router should allow you to reuse port 9 as the internal port but there needs to be a one to one mapping between external ports and internal computer IP addresses. In your WoL client specify the port you've configured for that computer to wake that specific computer up. In the Off app you'll find this setting in the Computer Details screen under "Wake-on-LAN Port Override"
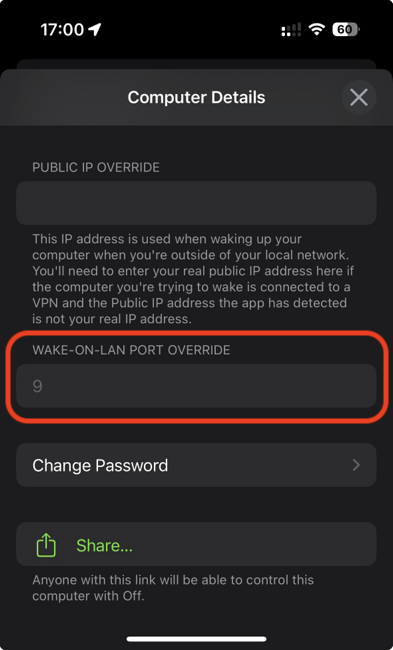
If your computer is connected to the internet through a VPN you'll likely find that trying to send a magic packet to the public IP address it's reporting while connected to the VPN doesn't go through. WoL clients require your real public IP address to wake up your computer over the internet. You can find your real IP address if you disconnect from your VPN and go to whatismyipaddress.com. In the Off app you can enter this on the Computer Details screen under the Public IP Address Override field. Note that this IP may change from time to time so you may need to update it in the future.